• Skip to primary navigation
  • Skip to main content

LifeSkill Secrets

Joyfully Manage Your Life, Your Self and Your Stuff

  • About LifeSkill Secrets
  • Self Care
  • Care of Stuff
  • Life Management
  • Contact

Self Care

Self Care

Treat yourself with the love and care you would give the person you love most in life. Love your self. Care for your self.

Speak to your self with kindness. You know what I mean. Listen to the thoughts that are going through your head – hundreds per hour. Are they affirming, encouraging, supportive and loving? If not, it’s time to start speaking with kindness and respect to yourself.

You are taking the initiative to learn and do things someone else has done for you and you now are going to do for yourself – self care. Good for you! This takes practice so give yourself some grace.
« Previous Page

Loving Yourself Starts with Self Care

February 6, 2018 Leave a Comment
All content copyright LifeSkill Secrets

Self Care and Hierarchy of needs

Loving yourself isn’t about being self-absorbed, but about caring for yourself in the ways you wish to be treated. The way you care for yourself indicates to others how you perceive your own value and worth. You teach people how to treat you when you love yourself: that you are worthy of respect and care and love.   You know yourself better than anyone else does, and if you don’t care for yourself and treat yourself with respect, why should anyone else? Start by realizing your own value and treat yourself the way you wish to be treated.

The Basics of Loving Yourself:

Treat yourself with the love and care you would give the person you love most in life. Love your self. Care for your self.

Speak to your self with kindness. You know what I mean. Listen to the thoughts that are going through your head- hundreds per hour. Are they affirming, encouraging, supportive and loving? If not, it’s time to start speaking with kindness and respect to yourself.

You are taking the initiative to learn and do something someone else has done for you and you will now do for yourself – self care. Good for you! Self care takes practice so give yourself some grace.
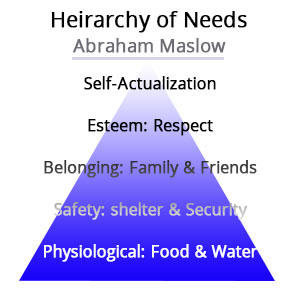
Abraham Maslow, in A Theory of Human Motivation, defined the needs of humans in a pyramid. He stated that each level needed to be taken care of for the next higher one to be.  For example, if one is deprived of food and water, they are not worrying about becoming their best self. So, taking care of your basic needs of food and water and organizing your shelter (home-care) and security (you and money), you can move on to improving relationships with friends and family, developing self-esteem and finally becoming the best and most complete you possible.

As great as you are, you are not Superman or Wonder Woman. There are limitations to what you can do. You probably can do and be much more than you think, but the wise person knows his limitations. In this case I am referring to the fact that there are only 24 hours in a day, and some of that needs to be spent in sleep, self-care, and life maintenance. These are the 3 areas for which young people (and workaholics) especially don’t allow enough time.

More on recognizing and working with limitations next time.

Filed Under: Self Care

KNOW YOUR LIMITATIONS

January 23, 2018 Leave a Comment
All content copyright LifeSkill Secrets

A man's got to know his limitations- Dirty Harry

“A man’s got to know his limitations.” – Dirty Harry

Saying you don’t have the time is lame. You have the same number of hours in a day and week as everyone else. There are two things that do make a difference in how you deal with time:

Energy:

We don’t all have the same metabolism. Some people have tons of energy and go-go-go all the time and need very little sleep. Other people have the energy of molasses in January and need tons of sleep. Lack of energy can be a limitation and can make a difference. I never felt I really had an excuse not to get things done. My 90 year old grandfather put in a new kitchen floor a few months before he died (sheet vinyl- not tiles) and he was only able to be up 2-3 hours a day. So there are ways to plan your time and activities to get a lot done.

Organization:

They say that if you want something done, ask a busy person to do it. (Depending on your source, this is attributed to Benjamin Franklin, Elbert Hubbard or Lucille Ball). The reason for this is a simple rule:

If you know all the things you have to do and have limited time, you will tend to be working on something all the time.
If you have few things and much time, you may procrastinate and then not get any of it done.

LifeSkill Secret if you feel overwhelmed by all you have to do:

  1. Get the to-do list out of your head and onto paper.

    Everything in your head has equal weight, or disproportionate weight for its importance. Once you get in on paper, you can decide what’s most important and what has deadlines. Get the tasks on the calendar to be sure they get done. Once they are out of your head and onto your calendar, you don’t need to worry about them. If you have a list of the things you plan to accomplish each day and read it over before and midway through the day, you are programming your mind to find ways to get those things done. Also, you may find you get little important tasks done in between bigger tasks, like calls made in between meetings.

  2. The five minute rule:

    Most tasks can be done in 5 minutes, or broken down into 5 minute chunks. Just because you don’t have time to do an entire task, doesn’t mean you can’t work on it or make progress on it. This way, those little chunks of time can be useful and help you feel like you are making progress.And little tasks seem much less daunting. Sometimes its just getting started on the task that is the roadblock, but if you have a small task to do, and you know you can knock it right off, you get started. Then you may be motivated to move on.

  3. Hard work is an accumulation of little things you didn’t do when you needed to

    (a modern variation of ‘a stitch in time saves nine’). A lot of 5 minute or under tasks can prevent those big, nasty jobs we all hate. Examples:

    • Wiping down the moisture from the shower stall after a shower takes less than 2 minutes but can save big time scrubbing the walls later.
    • When talking on the phone, clean out a kitchen drawer or pick up your desk.
    • When putting away your laundry, discard clothes that are worn out.
    • Every time you buy one new thing, get rid of at least one old thing (prevents needing to clean out closets and drawers)
    • Before putting away groceries, check for and discard old food in the fridge or out of date food in the cabinet.
    • Soaking a stain or using a stain remover BEFORE the stain has time to set may save whatever you have stained.
    • Once a week, before you put in clean towels, clean the bathroom.
    • Once a week, check all the things you use regularly in the bath and refill what needs refilling.
    • Put items on the shopping list that need to be replenished.
    • If you notice you are low of any groceries, laundry, cleaning or grooming supplies, put them on the list.
    • Only shop once every week at most. Take your list, stick to your list, and don’t go when you are hungry.
  4. The 15 for 15 exercise.

    Each morning (if possible) or evening if not, quietly sit for 15 minutes and ask the universe (God) for direction on what to do today to get closer to your dreams. Write down the first 15 things that come to you. Prioritize by what you feel the most energy about and put on your calendar. You may only get a few, or even one of the things done, but it will be the most important thing to get you closer to your dreams. Having the list keeps you focused and on-task. Sometimes those little things can just get squeezed in between bigger tasks because you remember to do them.

Limitations are only that if you don’t know what they are and how to work with and around them. Once limitations are identified, you can plan to make the best use of your time, money, energy and skills.

Let MOM know through comments and likes if you found these ideas helpful.

Filed Under: Self Care

Comfort Food: Chili, Corn Pudding, Ground Beef Prep

January 14, 2018 Leave a Comment
All content copyright LifeSkill Secrets

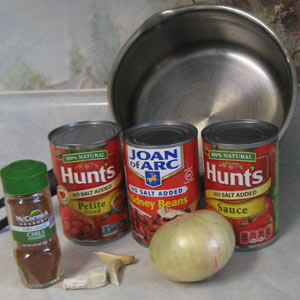
Comfort Food: Chili ingredients

Comfort food means different things to different people, but its food that makes you feel safe and secure. Usually comfort food is food that Mom made when you were sick or sad. I also think of comfort food as food that reminds you of good times. We often ate Chili and Corn Pudding while watching football games during football season- fall and winter, so I think of it as “feel warm food”, which brings back great memories of being safe and warm and together on Sundays as a family.

I once heard someone explain the difference between baking and cooking this way: In baking you have to follow the recipe exactly, in cooking you don’t.  Although that is not totally true, cooking is much more flexible, as you will see in the recipes below.

These are 2 very easy recipes for quick and easy comfort food- and perfect for football- like the Superbowl.

Corn Pudding

10 min prep | 45 min bake | servings 12

 Preheat oven to 350 degrees.

  • 1 ( 8 1/2 oz ) box Jiffy Corn Muffin mix
  • 1 ( 15-16 oz ) can Whole Kernel Corn with juice
  • 1 ( 15-16 oz ) can of Cream Corn
  • 1 stick of melted butter or margarine
  • 1 cup sour cream
  • 2 eggs  (I have seen recipes with 0, 1 or 2 eggs so see what you like best, or use ‘em if you have ‘em.)

How to make:

Mix all ingredients in a medium bowl until blended. Pour into a 9” x 13” (or 2 quart flat glass) baking dish. Bake uncovered at 350 for 45-50 minutes or until lightly browned and knife inserted in center comes out clean.

LifeSkill Secret: Prepping ground beef for multiple uses

I like to buy 3 pound packs (less cost per pound for the larger amount) of ground beef on sale. This way I do the work only once for 3 meals. This way you have the ground beef all ready for this or other dishes and you have saved on the cost of the ground beef.

  • Brown the beef by crumbling into a 12” skillet (9 or 10” if just one pound) over medium heat and brown it. Be sure its thoroughly cooked through.
  • Cool it in the fridge for a few hours or overnight.
  • Split it into 3 quart freezer bags, seal tightly (get the air out), label (date and contents) and freeze (or use 1 pound and freeze 2).

You can also brown it with 1 diced onion per pound, then the onion part is done too. You can also cook the garlic cloves here too.

Chili

If beef, onions, garlic from frozen:  10 min prep | 1 hour cook | servings 4

If cooking beef, onions, garlic from raw:  30 min prep | 1 hour cook | servings 4

  • 1 pound ground beef
  • 1 Medium onion chopped
  • 1-3 cloves garlic minced
  • 1 can tomato sauce
  • 1 can kidney beans (I use dark red)
  • 1 can tomatoes- I use diced without additional spices, but use what you like)
  • 2t- 1T (more if you like) Chili powder

Optional toppings:

  • Shredded cheese (cheddar, cheddar jack, jalapeno)
  • Sour cream
  • Chopped onion or scallions

How to make:

  1. Chop the onion
  2. Mince the cloves of garlic
  3. Brown the ground beef and onion in a skillet ((9 or 10” if just one pound, 12” if 2-3 pounds) over medium heat until cooked through (don’t cook higher or you will toughen the protein in the meat. Be sure it’s completely cooked).
  4. Part way through the cooking, add the garlic.
  5. Meanwhile, in a large saucepan (2 liter or 2 quart) put the contents of the cans and the chili powder.
  6. When the beef mixture is cooked and drained, add to the saucepan.If using a frozen bag of ground beef , defrost in the microwave  (defrost or 30% for 5 minutes) or add frozen and cook longer. If you didn’t add onions and garlic to the ground beef when you cooked it to freeze, you can either brown them in a little olive oil and add below, or put them in raw.
  7. Heat over a medium-low heat uncovered. If it spits, lower the heat a bit. Simmer for about an hour so the flavors mix.
  8. Serve with grated cheddar cheese on top, and sour cream if you like. If you add lots of chili powder to the chili, you may want to add diced onions on top. I like Corn Pudding underneath my chili.

Watch for another post or two with more recipes for easy, throw-it-together comfort foods that use frozen (or freshly browned) ground beef.

Enjoy the game!

Filed Under: Recipes, Self Care Tagged With: Corn, Ground Beef

Vision is Where You Start

January 2, 2018 Leave a Comment
All content copyright LifeSkill Secrets

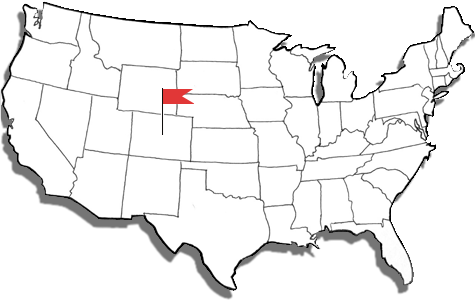
US outline map with map flag in Denver

If you start with a clear vision of what you want your life (or your appearance or your home) to look like, you will know what doesn’t fit with your vision and what does.

“How can you get there if you don’t know where there is?”

If I really wanted to get to Denver, but just started driving, you’d think me pretty silly for complaining if I ended up in Nashville. I need to know where I am going to be sure I get there, then take steps to figure out how.

Know where you are now

Whether or not you think this way, you are the center of your universe. For your life to work well, you need to take care of yourself. Your family, your friends, and others in general are not as important in determining the way your life will turn out and the path it will take as you are. Even God won’t give you what you need if you don’t ask.

So, you are responsible to take care of yourself. I know it sometimes seems scary, but actually it’s pretty liberating. The only challenge is knowing how to take care of yourself, and that is the purpose of this website.

It’s important to know where you are starting. Look at the different areas of your life and evaluate how you are doing, where you need it to improve and where you are right on the road to where you want to be.

The usual areas to look at are:

  • Physical
  • Relational
  • Vocational
  • Creative
  • Financial
  • Spiritual/ Emotional

Have a vision for your life: Start with the end in mind

Take time to know what it is you want to accomplish in each of these areas. It is very important to have a road map for where you want to be at the end of the year, in 5 years, in 20.  This is a journey.

Pick the area or areas that are most important, or that the others are dependent on. When I first did this, everything depended on making more money. Pretty clear where I needed to start.  Another place you may want to start is in an area that would be easy to accomplish. Starting there will give you self confidence and a belief in moving forward.

Don’t make yourself crazy by trying to do everything all at once. Focus big-time in one or two areas, or start making very small changes in more areas.

Put it on the calendar

A dream without a deadline is just a wish. A goal is just a dream with a deadline.

Decide on a date by which you want to have each dream accomplished and put it on the calendar.

Break down the steps necessary to accomplish your dream, determine how long it will take to do each step and then give each of them a date on the calendar.  Simple, but not easy.

At the beginning, its best to practice by focusing on one or two dreams at a time.

Change is a Habit

It takes a month of daily change to break a habit, so be tough with yourself daily for at least a month. Stick with it. Remind yourself of your vision and what you want to accomplish.

Keep your vision in front of you

One of the best techniques I have learned to stay focused is based on the main one in the book, “Think and Grow Rich” by Napoleon Hill.

Envision what you want- fully envision it. What would your life look like, smell like, taste like, and how would you emotionally feel if your vision were a reality?

Daily bring that vision as fully to mind as possible and recite:

By (this date)
I will have (or be)
I believe (what you want to achieve or receive) will happen (or come to me).
My faith is so strong that I can see or feel myself  doing (what would you be doing or feeling if this vision were true).
This will come into my life in exchange for (nothing is free- what are you going to give or exchange to have this become a reality).
I am waiting for a plan to come to me and I will act on it as soon as I receive it.

Reward Yourself

We all work better with rewards, so spend some time thinking of rewards to give yourself- not just when you complete your goal (because that sort of is its own reward), but at milestones along the way to keep you going.

Give Yourself Grace

If we were perfect, none of us would need any help at all. We are not starting perfect, we will not end perfect and we certainly wont be perfect as we strive to improve. You are working to improve your life so give yourself high-fives for that!

Be as loving to yourself as you would want Mom to be if you didn’t do as well as you wanted. Encourage yourself, focus on what is going right and stay positive. Give yourself grace, patience and understanding and determine to start again tomorrow.

Sign up to get the LifeSkill Secrets newsletter to keep the encouragement and new ideas coming to care for yourself and become a joyfully independent adult.

Filed Under: Life Management, Self Care, You and The Universe

Toaster Oven Cooking

December 26, 2017 Leave a Comment
All content copyright LifeSkill Secrets

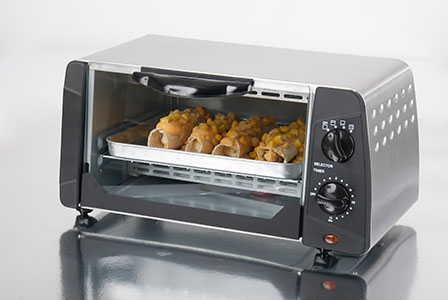
Toaster Oven

My toaster oven is the appliance that gets the most use in my kitchen. I love it because its so versatile and perfect for doing many things, all without the wait or heating of the oven and with more convenience to clean than the broiler in the oven. It works better for small families due to its size, but a 6 slice toaster oven in slightly larger than a 4, so I find it a good balance.

Toaster Oven Toasting

Of course, a toaster oven should be able to toast. The advantages to a toaster oven over a toaster are that it can toast wide or thick things like bagels and Texas toast. When you toast items on a sheet, its easy to toast open face sandwiches like Patty or Tuna Melts, as well as things that can get messy or tricky in a toaster, such as cinnamon bread or bread with raisins.

Toaster Ovens really shine at Broiling

Broiling is the healthiest way to cook meat, and a good toaster oven needs to be able to broil. Broiling is not only the healthiest method, but can be done quickly and efficiently with a toaster oven. Keep in mind that different ovens heat at different rates and have different temperatures when set to broil, so pay attention to how long it takes to cook meat through with YOUR oven. Times may vary. Here are some suggestions. Use meats that do well grilled, meaning they can tolerate dry heat.

Steaks

For all these foods, I cover my tray in aluminum foil to make clean up easy. For steaks or chicken breasts, I spray Pam on a rack and place the rack on the tray. (Tray and rack sets are available for toaster ovens if yours does not have them). I add garlic powder and fresh ground black pepper to both sides, then broil from 5- 10 minutes per side depending on the thickness of the steak. It should be nicely browned and done to your taste. You may need to cut it in the middle to test and put back for a minute or two if not done enough.

Safety Tip

Do NOT leave the kitchen when there is food in the broiler. Because of the closeness of the meat to the heating elements, any fat can catch or start a fire. If this happens, unplug the toaster oven from the wall, allow it to cool a minute and CAREFULLY drain any fat from the tray. Preheat again before putting the meat back in.

Chicken Breasts

I usually coat chicken breasts in Kraft’s Greek Dressing before I put them on the Pam coated rack atop the foil covered tray. How long is tricky because chicken breasts vary so much in size. However, you can use an instant meat thermometer to be sure its up to 165

Salmon or other fish

For salmon, I cover the tray in aluminum foil then place the salmon skin side down on the foil. I then broil in a preheated toaster oven about 11 minutes give or take. Its almost right on that time or a bit more, seldom less. Cook only until the fish separates easily from the skin. Do not overcook. If there is no skin, spray the foil with Pam first.
I will admit I have not cooked other fish this way but am sure it would work.

Baking – more of a challenge for good results

I have baked a few things in the toaster oven, but the space is so small that it would take too many rounds to bake a normal recipe of cookies or scones, or whatever. Also, the airflow is not ideal in such a small space. Having said that, it is great to heat things up, like pizza or rolls. It also works well if you have dough for a few cookies (if you make a whole recipe and only bake a few as needed/ wanted).

To me the toaster oven is essential. If you are a one or two person household, you might try it, especially for quick and healthy broiling of meats.

Bon appetit!

Filed Under: Kitchen, Self Care

Tying a Necktie – Full Windsor

December 19, 2017 Leave a Comment
All content copyright LifeSkill Secrets

Man in black suit requires tying a necktie

Tying a necktie is much more intimidating than it needs to be. Here I have included a great video, easy instructions some tricks to make it easier the next time. This is the full Windsor knot because it’s easier to create a nice symmetrical knot and it always looks great.

Basic Instructions for Tying a Necktie

  1. Be sure the tie is facing right side out.
  2. Position the tie with the wider end on the right side. The wide end needs to be longer. Some recommend that the longer (wide side) be twice as long as the narrow side. Then it would be hanging down farther 10- 12 inches or more than the narrow end. It takes some practice to get this positioned correctly, but see our tricks below for future.
  3. Cross the wide end over and under the narrow at the neck, pull through up between the tie and the neck. The wide end is now on the left side and you see the front side of the tie facing out.
  4. Pull the wide end under the narrow end of the tie. Then (from front to back) over and down the neck part of the tie.  You will have an over and under on each side of the center at the neck.
  5. Wrap the wide end of the tie over the narrow, then under the tie at the neck.
  6.  Bring the tie down through the part that you just crossed over.
  7. Tighten and arrange the tie
  8. You can tuck the narrow end through the label on the backside of the wide end (or use a tie clip) to keep the tie neat.

Video on Tying a Tie

More on your Necktie

First, take good care of your ties. Neckties get a lot of abuse, but if they are abused, they aren’t going to look good. Usually they are dry clean only. Hang them on necktie hanger or roll them to store in a drawer. Store them when not using them.

Tips for Tying a Necktie

  1. If you have a big event and you know you will be stressed getting ready, do the following:
    • Get your necktie tied perfectly in a practice session.
    • Holding the knot in your right hand, loosen the neck at the left side by pulling until you can get the tie over your head.
    • Hang the tie over the hook of a coat hanger (with your shirt or suit) or lay out where it won’t get crumpled.
    • When time to get ready for your event, just put the tie back on over your shirt and pull the narrow end of the tie at the tail end until it is set.
  2. Setting the right length of the sides of the tie:
    • Before you practice tying your necktie, put a rubber band around the tie near where the center back of the tie is when the tie is positioned correctly to tie.
    • Once you have gotten the tails of the tie exactly the right length after tying, be sure the rubber band is exactly in the center back of your neck.
    • Remove the tie.
    • At the place of the rubber band, either pin a very small safety pin on the outside of the tie it would be up and down on the neck or across the width of the tie), or sew several up and down stitches at that point.
    • Next time you put on the tie, use the pin or the feel of the stitches as a guide to where the center back neck needs to be.

Look great. Feel great. Happy Holidays.

Filed Under: Appearance, Self Care

« Previous Page
DISCLAIMER
©2025 LifeSkill Secrets. All Rights Reserved.
Website Designed by Richterworks Web