• Skip to primary navigation
  • Skip to main content

LifeSkill Secrets

Joyfully Manage Your Life, Your Self and Your Stuff

  • About LifeSkill Secrets
  • Self Care
  • Care of Stuff
  • Life Management
  • Contact

Self Care

Self Care

Treat yourself with the love and care you would give the person you love most in life. Love your self. Care for your self.

Speak to your self with kindness. You know what I mean. Listen to the thoughts that are going through your head – hundreds per hour. Are they affirming, encouraging, supportive and loving? If not, it’s time to start speaking with kindness and respect to yourself.

You are taking the initiative to learn and do things someone else has done for you and you now are going to do for yourself – self care. Good for you! This takes practice so give yourself some grace.
« Previous Page

Basic Salad: the ‘Go-To’ Base

May 29, 2018 Leave a Comment
All content copyright LifeSkill Secrets

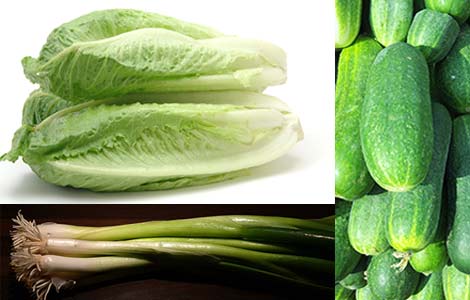
Basic Salad: Romaine, green onions and cucumber

In an earlier post on nutrition, I recommended that you eat a lot of vegies and protein. One ‘go-to’ meal base we use a lot is this basic salad. Its made with 3 simple ingredients we keep in the house all the time, so we can make it regularly. There are tons of things you can do with it so it doesn’t get boring.

Basic Salad

Tools

Large cutting board
I like this set because you get varied colors and sizes, they fold and roll, are easy to use, dishwasher safe (though i hand wash my larger ones) and store. The large one is great for chopping lettuce.

Chef’s knife
You only really need 3 or 4 basic knives, plus steak knives if you want. Use good knives. Here is a good starter Henkels set. If your have more limited budget, this is a set you can start with.
Be sure your knives are sharp- I prefer a 2 stage sharpener over a sharpening steel.

Veg peeler
I love my OXO veg peeler, easy to use, hold and clean.

Gallon zip locking bag
This is what I put the salad in when all chopped up. You can mix it all up in the bag, add dressing if desired to get it evenly coated over the salad- tends to use less and save calories. Of course, If you plan to eat it all right away, then put it in a large bowl.

Ingredients

This will make about 3 servings- try it first. You can always add more or less of anything.
Rinse the vegies under cool water and shake off excess water.
1 head Romaine lettuce
(Romaine lettuce has more vitamins and nutrients than iceberg and a more robust flavor. The greener the veg, the more nutrients)
Cut off the end and discard, then, holding the whole head with your non-dominant hand, slice the lettuce into 1/2 inch slices from the bottom to the top. Put the lettuce into the zip-locking bag.

3 green onions
Trim off the ‘hairy’ ends, line up the three onions and cut all three together. Slice the white part into slices about 1/4 inch. Most Asian cooking also uses the green part, and I like it too. Use your own taste preferences. Add the slides onions to the bag.

1/3 cucumber
Peel with the peeler- if desired. Then chop into small bits and add to the bag.

Seal the bag and gently toss/shake the bag to mix up all the ingredients.

That’s it- that is your base salad. Keep in mind that once lettuce is cut it starts to oxidize and brown, so plan to eat the salad with a day or two.
Fine. Now what?

Et tu, Caesar?

This salad started as a base for Chicken Caesar Salad but works just as well for Salmon Caesar Salad or Steak Caesar Salad.

  • Put about 1/3 of the Basic Salad mix into a pasta plate or onto a dinner plate.
  • Top with 4oz grilled chicken breast, roasted chicken, grilled Salmon or grilled steak
  • Sprinkle some grated Parmesan cheese over the top . We use the fresh or cheese aisle shredded or grated Parmesan. Because it tends to mold quickly, we keep a bag of it in the freezer. Don’t worry that its frozen, it will warm quickly, especially if you are sprinkling it on warm meat or fish. Just use what you need, reseal and put back in the freezer.
  • If you didn’t dress the salad in the bag, add dressing. I am partial to Marie’s Caesar which is found refrigerated in the produce department.

Eh taco!

The basic salad is great used on tacos along with seasoned ground beef (see the post on preparing ground beef), tomatoes (if desired), grated cheese and salsa. Yum. Also works as the basis for a great taco salad with all the same ingredients and some tortilla chips.

Chopped Salad

Use the basic salad recipe as a basis for a chopped salad. Top it with whatever you like (just b e sure you get plenty of protein).
Suggestions:

  • olives
  • sliced hard cooked eggs
  • chick (garbanzo) beans
  • kidney beans
  • grated cheese- cheddar or whatever you like
  • peas
  • beets
  • vegies- (uncooked) zucchini, spinach, carrots, celery
  • tuna fish (drained and straight from the can)
  • tuna or egg salad

Come up with other great combos? Let us know about them. Bon appetit!

Filed Under: Recipes, Self Care

Basic Nutrition: Tips to Eating Well

May 8, 2018 Leave a Comment
All content copyright LifeSkill Secrets

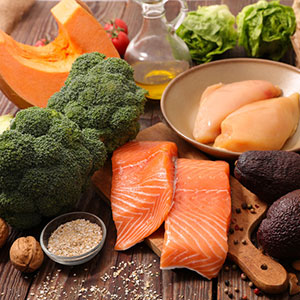
Basic nutrition with vegetables, eggs, salmon and fish

Your body needs fuel just like your car does and it works to the level of what’s put in. If you put junk, it just isn’t going to work well. Period. Yeah, you may be young and healthy now but sooner or later it catches up with you. Basic nutrition is easy to understand and follow. Here are some very easy guidelines.

Basic nutrition for Losing Weight, Saving Money, Eating Healthy

I used to say that we could afford to eat junk food OR afford to eat well, not both. Junk food is expensive. The easiest way to save money, stay at a good weight and eat healthful food is to buy and eat foods that focus on protein, veg and fruits.

The most important meal of the day is breakfast. You have heard it and heard it, but that’s just because it’s true. Skipping breakfast is bad for your body, your emotional health and for your mental performance as well. Be sure there is enough protein in breakfast- like 20 grams. Try to split your daily calories so breakfast gets its fair number. If you eat a lot of carbs at breakfast, you will crave them all day so keep them minimal and healthy (oatmeal rather than white toast).

Don’t miss breakfast especially if you want to lose weight. The longer your body goes without food, the more it goes into starvation mode- meaning every calorie gets stored to protect the body. Plus, if you go too long without eating, you will want to eat more than you need without much concern about the quality of the calories.

If you want to lose weight, I have found that just omitting white food- flour, sugar, potatoes, rice, etc. – will drop the pounds faster than anything – while keeping you healthy. I don’t always follow this because I love bakery products, but I know it to be true.

The Superheroes

Protein

The basic building block of your diet needs to be protein. Besides being necessary to build muscle and fuel our bodies on a long term basis, regular protein intake keeps blood sugar more even. Not everyone is AS sensitive to blood sugar variations as people in my family are, but that could just be because they aren’t paying attention. We all have blood sugar highs (energy and excitability), and lows (sadness, lethargy, irritability).  It’s so obvious in my family that if someone gets cranky, we tell them to go eat protein.

Protein doesn’t have to be red meat. In fact, it’s a good idea to limit the amount of red meat in your diet. Other sources of protein include poultry, eggs, fish, nuts and dairy products. Certain foods combined also provide complete protein, like milk and rice.

According to the Harvard Health blog, “Current guidelines for adults of any age recommend 0.8 grams of protein per kilogram of body weight. To find out how much you need, multiply your weight in pounds by 0.36. Or use an online protein calculator.  So, a 160-pound person would need 160 x 0.36 = 58 grams of protein a day.”

My doctor, a leading alternative health doctor, told me to get 60 grams a day, and I weighed 120 pounds at the time. Either way, thinking 20 a meal or adding a snack of nuts (1/2 cup almonds =10 grams of protein) to get to the 60 grams, or to supplement it if you are over 160 pounds is a good rule of thumb.

A serving of protein in meat is usually about the size of a deck of cards, so the 12 or 16 oz steak is more than one meal!

I grill most meat in the toaster oven. It’s far more nutritious than frying or boiling and easier than any other method of cooking. Experiment with herbs for seasoning (rather than salt or flavored salts).

Vegies

Fall in love with vegies, and the more colorful they are the better. Colors in vegetables are the result of nutrients, so the more color the more nutrients. Spinach is more nutritious than Romaine lettuce which is more nutritious than head lettuce.

Try vegies you haven’t tried before. Just because you may not have liked them as a child doesn’t mean you won’t as your grow older. Your palate changes as you grow up. Give them another chance.  (Keep this in mind when or if you are a parent- many children will not like broccoli, spinach or cauliflower, so don’t force them to eat it.)

Organic often taste better and are sometimes healthier, but of course they can be more money. I was amazed at the taste of organic tomatoes. Experiment. The more you pay attention to the natural flavors of food, the less you will want to mask them with sauces and other high calorie/fat accompaniments.

Steaming is the best method for cooking vegies and the microwave is a dream for this. Put the vegies in a microwavable dish, add a little water, cover with a microwavable plate and nuke on high til done. (Time depends on how much veg you are starting with and the kind it is).

The ‘Use in Moderation’ guys

Fruits

You may be surprised that I put fruits under ‘Use with Moderation’. Part of any basic nutrition includes fruit, but not all fruits are created equal. The issue here is sugar. I suggest eating fruit daily, but avoiding or limiting those which are high in sugar, especially if you have weight or health issues. High sugar fruits include things like lychees, mango, cherries, grapes, figs. Ones that are less dense but we tend to eat larger quantities of, like watermelon,  can also overdo the sugar intake.  Best choices are blueberries, strawberries, cranberries and raspberries.

Dairy

I almost forgot to include dairy- shame on me. Now, I know many people can overdo this or neglect it altogether, but dairy can be a great source of protein and I just read that low fat dairy is great for improving mood. We love cheese, but cheese can be high in fat, so do watch that. IT becomes easy to put cheese on everything. Ask yourself if it needs it- really. Again, dairy products are great but use in moderation and try for organic.

Grains

There is probably more controversy over grains than any other food stuff. The problem is that, as a society, we eat way more than we need. You can go without grains and be perfectly healthy (if you are eating cruciferous vegetables to clean out the colon). Just like anything else, there are better and less good choices. Also, we have a habit of adding things to our grains (like sugar and fat) that make them less healthy. Oatmeal is a good place to start with grains. In a later post I will add a recipe for our oatmeal that is actually very nutritious.

If you eat (or want) grains, think about how you are eating them. Can you do without the salt on the tortilla chips (corn is not a veg, but a grain)? IF you want to lose weight, cutting back here is the best way to start.

Fats

Even if you want to lose weight, fat is important to the body too. It helps tell the body you have had enough to eat, which is why people are so often hungry when on a diet. But more important, it is essential to provide the building blocks for hormones, which we need to be healthy. Fats can come from healthy sources like nuts, olives, olive oil, avocados, even butter (in moderation).

The ‘Avoid and Omit’ Guys

Salt

As good as restaurant and prepared food may taste, it’s loaded with salt, which will eventually give you high blood pressure (and bloating). And trust me, that is NO fun- and dangerous. Young people are getting high blood pressure younger and younger because of the amount of food they are eating that was not prepared from scratch without loads of salt.

It does take a little while to get used to the taste of food without salt in it, but you enjoy it more by adding a little salt after the food is cooked and you can really taste it then. Don’t add salt in the cooking of anything. Start by using unsalted butter and unsalted canned vegies (or better-cooking from raw), and really watch the sodium on prepared and frozen foods.  They can be absurdly high. I got high blood pressure from eating too many “healthy” low calorie frozen meals that were loaded with salt. It was the primary source of salt I was consuming.

Sugar

Yeah, I know. Believe me. But it is the devil and we all know it. Sugar is responsible for so much more than diabetes. Moderate your intake. Try doing without it altogether, then when you have a little, it will be wonderful. Stop binge eating anything, but especially fat and sugar laden snacks, cookies and cakes. Remind yourself that you only deserve good, high-quality food and that includes only the best desserts. Hold out for high quality sweets, occasionally. Then enjoy.

You are in charge of what you eat

Love yourself enough to care what goes inside. That will determine how you feel, how much energy your have, and what you look like. If you are not feeling your best, try changing what you eat. Sometimes that’s all it takes.

LifeSkill Secrets wants you to be healthy, but it’s up to you!

Filed Under: Health, Self Care

Medicine Cabinet Essentials

May 1, 2018 Leave a Comment
All content copyright LifeSkill Secrets

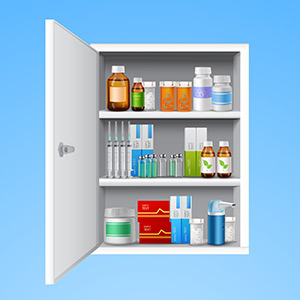
Medicine cabinet essentials

The time to have emergency medical supplies in your place is not when you need them. Planning ahead by being sure you have the medicine cabinet essentials listed below for illness or injury ensures you have less aggravation when the time comes.

Even though we all get sick from time to time, how you prefer to treat your illness may vary a lot. It’s important to have the following in your home in a place that is easy to lay your hands on (because its no fun to have to go hunting for things when you don’t feel well). However, its better if these things are not stored in the heat and humidity of a bathroom. In a box in a pantry or closet is best. I like a sweater sized storage box (12 or 16 qt size) with a label on it that says First Aid or Medical.

Well Stocked Medicine Cabinet Essentials

  • Thermometer
    Be sure you have an oral thermometer. It’s a great idea to check your temperature occasionally when you feel fine to learn what your normal baseline is.  My son’s normal is over a degree less than the average, which is 98.6° F.
  • Acetaminophen
    A pain killer for headaches and the pain of cold or flu.
  • Ibuprofen (an anti-inflammatory)
    Though both acetaminophen and ibuprofen both are pain killers, they really are good for different things and sometimes one is just better than another. Ibuprofen is better for menstrual cramps and strains and sprains.
  • Decongestant if you can take it (see WARNING below).
    NOTE: products containing pseudoephedrine (like Sudafed, which is my preferred), are kept behind the counter in pharmacies by law. You must ask the pharmacist and sign for them.
    WARNING: Decongestants can be VERY dangerous if you take some heart drugs so be sure to ask your pharmacist if it’s compatible with any prescription drugs you take.
  • Cough medicine
    Those containing dextromethorphan are good for just cough. If you get mucus, you might want to get one that also contains guaifenesin, an expectorant, which will help you clear the chest congestion.
  • Bandages
    Bandages are the granddaddy of medicine cabinet essentials.
    You want the stick on type in various sizes. You can buy a box with an assortment of sizes.
    I get a lot of blisters, so always have some of blister band aids in the house.
  • Sterile Gauze and tape
    An assortment of sterile gauze is also a good idea. You will need tape to secure gauze. Paper tape or surgical tape are great if you are sensitive to adhesives or have sensitive skin.
  • Rubbing alcohol
    For cleaning tweezers and thermometers, cuts and scrapes (if you want more cleaning than soap and water).
  • Elastic Bandage
    At least one. If you get a lot of sprains, you may need more than one. These are great for a turned ankle or wrist.
  • Hydrogen Peroxide
    For cleaning out cuts after water. Also great for getting blood out of color safe washables (test in an inconspicuous area to be sure the dyes in the fabric don’t run).
  • Antibiotic ointment
    Great for minor cuts, minor burns or blisters
  • Calamine lotion
    Calamine helps itchy rashes, poison oak or ivy, or bug bites.
  • Tools
    • Magnifying glass and tweezers: To remove Splinters
    • Scissors: to cut tape and gauze
    • Weekly pill container
      Have one for each time of the day you regularly take pills and fill once a week. This makes keeping track of whether you have taken meds much easier and you can see ahead if you are running low. So if you take meds morning and night, then you need 2.
      I suggest making a habit of filling these once a week.
    • Eyeglass repair kit for replacing screws if you wear glasses.

Check the expiration dates on all the drugs, lotions and ointments when daylight savings times changes (along with replacing batteries in smoke and carbon monoxide detectors). Also be sure that you have all your medicine cabinet essentials in good order at that time.

Be Healthy!

Filed Under: Health, Self Care

Basic Eggs: Basted, Scrambled, Omelets

April 3, 2018 Leave a Comment
All content copyright LifeSkill Secrets

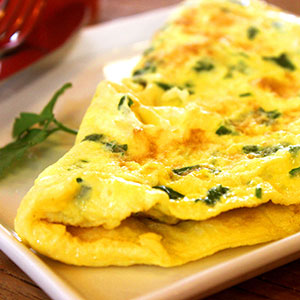
Basic Eggs: Omelet

Apart from the egg cooked in the shell, here are recipes for other basic eggs: basted, scrambled and omelet.

I didn’t know what a basted egg was until well into my 20s. This recipe for a basted egg is a terrific replacement for traditional basted eggs, fried over easy or medium, and even poached eggs since it uses water rather than fat to baste.

I use an 8 inch non-stick fry pan for 2-3 eggs and the lid from one of my saucepans that is not too tight fitting. Its best if its slightly smaller than the widest diameter of the fry pan.

Basted Eggs

  • Place pan over medium heat (tend toward the low side of medium rather than the high side of medium).
  • Melt a little butter in the pan. ( Optional if using a non-stick pan. Mandatory if not.)I run the unwrapped end of a stick of butter around the slightly heated pan just to coat the bottom.
  • Break eggs into the pan. The thing to keep in mind when breaking an egg is that “it’s all in wrist”. Pivot from the wrist and try to make a swift clean crack with one stroke which can then be opened with the shell in two parts.  Practice this even when you don’t need whole yolks, like when you are making scrambled eggs or omelets. The idea is to do this without breaking the yolk. If you aren’t good at this and really want the yolks unbroken, break them gently into a small dish then ease into the pan one at a time.
  • Cover the pan with a lid and wait until you hear a quiet sizzle (if you used butter) or 2-3 minutes.
  • Pour about a tablespoon of cold water onto the lid so it can run into the pan. If the lid is tight fitting, lift the lid, pour the water into the pan and quickly recover the pan. The water will heat quickly and steam the eggs.
  • Wait another 2-3 minutes and lift the lid to check the eggs.
    • If the eggs are done, turn off the burner and slide the eggs out onto plate.
    • If the eggs are not done
      • Put the lid back on
      • If the top of the eggs need more cooking, add a teaspoon or two more water and recover.
      • Check again in a minute or two and repeat until done.
  • Salt and pepper to taste and enjoy!

Use more water for more poached like eggs.
Cook longer for eggs more like fried.

Serve with or on toast or toasted English muffins.

Scrambled Eggs

There are probably as many ways to scramble eggs as there are people to scramble them. Its really easy. All you need to remember is to keep the stove temperature to the low side of medium    and scramble the eggs from time to time, turning over the cooked side an allowing the uncooked egg to get to the pan.

  • Break the number of eggs you want into a bowl and whip up with a fork.
  • You can add a little water or milk. You can add chopped vegies, onions, bacon, ham or lox, too. Try adding spices like a pinch of dill.
  • Heat the pan over medium (to medium-low) heat and add butter if desired.We love cream cheese scrambled eggs and melt a nice sized glob of cream cheese in the pan first, breaking it into smaller pieces with the cooking utensil and then adding the eggs.
  • Pour the eggs into the skillet
  • Allow to cook until they just start to set on the bottom.
  • Mix the eggs by turning over the cooked side to allowing the uncooked egg to get to the pan. REMEMBER: DO not use metal in non-stick pans. Use a plastic utensil to stir the eggs in the pan. I prefer a cooking fork but they are very hard to find. Many people use a spatula for this.
  • Continue until the eggs are done then transfer to a plate.

The more you mix the more crumbly they become, so if you like larger chunks, mix less often.

Basic Omelets

OK, so an omelet is basically scrambled eggs that aren’t scrambled and have stuff in them. They are traditional and staple French food. If you have eggs and a little cheese, you always have something to eat.

Ingredients like meat, onions, peppers, and some cheese can be added to the eggs before cooking or can go in the center of the omelet after cooking and before folding over. Have filling ready BEFORE you start cooking if adding it into the fold.

  • Break the number of eggs you want into a bowl and whip up with a fork.
  • Add a little (about 2 Tablespoons) cream or milk (water if you must) and a dash of nutmeg and mix it in.
  • Add any other ingredients you want in the eggs and mix in. (NOTE: you want about a 1/3 cup of “stuff”)
  • Heat the pan over low heat and add butter if desired.
  • Pour the eggs into the skillet and cover.
  • Cook until the eggs are completely set and a little puffy.
  • Place the filling ingredients on half the omelet. Fold the other side over (if cheese, recover and give it a minute for the cheese to melt.)
  • Turn off the heat
  • Slide or invert the omelet onto a plate.
  •  Salt and Pepper and garnish if desired.

(NOTE about Salt and Pepper:  These have a lot more oomph if added after cooking and before eating. It’s a great way to cut down on Salt intake without missing out on flavor.)

Bon Appetit!

Filed Under: Recipes, Self Care

Hard Cooked Eggs, Soft Cooked Eggs

March 27, 2018 Leave a Comment
All content copyright LifeSkill Secrets

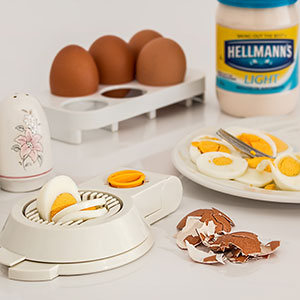
Hard Cooked Eggs

Eggs are pivotal representations of both Passover and Easter, and are a traditional symbol of spring. They are the perfect shape, self-contained and independent.

As a food, they are a low-calorie and fat source of good protein. They are inexpensive, easy to find and easy to prepare. I consider them a necessary staple and have some in the house at all times. If hungry and tired, there are many things that can be whipped up easily with eggs.

First – egg safety.

As I mentioned in the post on poultry safety, eggs can carry Salmonella, so eggs need to be handled with the same precautions as for preparing poultry. Eggs are safest when completely cooked through. However, I know that I don’t eat my eggs cooked through, nor my beef medium well.  For liability purposes I need to tell you that cooked completely is the only totally safe way to eat eggs. For recipes calling for uncooked eggs, you can get and use either pasteurized eggs or pasteurized egg products (usually above the eggs in the refrigerated section).

The FDA has a full list of egg safety tips here.

If cholesterol is a concern, replace some or all of the eggs in your diet with products like Egg Beaters which are all or mostly yolk-free, thereby reducing the cholesterol. These products make great omelets, frittatas, scrambled eggs and work perfectly in baked goods.

Second, eggs are protein

Like all protein, do not cook eggs at too high a temperature or your will destroy the texture of the protein.  This means low to medium temperature- even when frying.

Next, let’s talk about preparation.
Since the hard cooked egg is the egg of the season, I’ll start with the cooked in the shell eggs.

Eggs cooked in the shell

(soft, medium and hard cooked eggs- or “boiled” eggs):

  • To keep eggs from cracking, pierce the bottom (the fat part) of the egg shell. If you don’t have an egg machine with a piercer, you can buy an egg piercer.  You can use a clean needle or pin, but its easy to stab yourself (not recommended).
  • Place the eggs in a saucepan and cover with cold water by 1 inch.
  • Bring to a boil over medium-high heat
  • Cover and remove from the heat
  • Set aside for
    • Soft Cooked – 4-5 minutes
    • Medium  Cooked – 6-8 minutes
    • Hard  Cooked – 8-10 minutes
  • Drain the hot water
  • Cool in ice water or under very cold running water. (This keeps yolks from blackening and eggs from splitting.)
  • Peel (or drain and refrigerate hard cooked eggs, using within 1 week).

Now, having said all that, let me add that I ate soft cooked eggs every day for over 20 years and I used an egg cooker, which is much more reliable and consistent than the above method (and easier I find too).  However, whatever method you use will take some trial and error. With my egg cooker I found I needed longer cooking times to reach the doneness I prefer, so  I needed to add more water than it suggested.

OK, now you have those great cooked eggs. Here are a couple of recipes:

Devilled Eggs

  • Peel the eggs. This can best be done with a teaspoon (table not measuring). Gently crack the shell all around. Pick or pry off a piece of shell and pierce the membrane under the shell. Using fingers or the spoon, try to get under the membrane and pull off the shell. This takes a little practice.
  • Cut the eggs in two, either across or lengthwise. Lengthwise is easier because they sit better and are easier to fill, but I am not the egg police.
  • Gently scoop out the yolk into a small mixing bowl. Place the whites onto a plate or serving dish.
  • Mash the yolks with a fork.
  • Add the other ingredients and mixThis always includes mayo, yellow mustard and black pepper. I prefer Miracle Whip to mayonnaise, but that is just the way my Mom made them. Everything else is optional and I never measure, I just do it by taste. Below are guidelines to get you started:For 6 eggs use about:
    • ¼ c mayonnaise
    • 1 t yellow mustard
    • Black pepper to taste
    • 1 t white vinegar (optional)
  • Spoon or pipe the mixture into the eggs.
  • Dust Paprika over the eggs

Mom’s Comfort Eggs

(My Mom made this for us when I was a child and they are always my go-to when I am ill)

2 soft to medium cooked eggs
1 piece of white bread or a Hawaiian roll (I prefer Sweet) torn into small pieces
1 -2 teaspoon butter, melted
1-2 Tablespoons milk

Mix all together and add pepper and salt as desired.

Enjoy the holidays and enjoy your eggs!  Next post will be other ways to prepare basic eggs.

Filed Under: Recipes, Self Care

Safe Preparation of Poultry

March 6, 2018 Leave a Comment
All content copyright LifeSkill Secrets

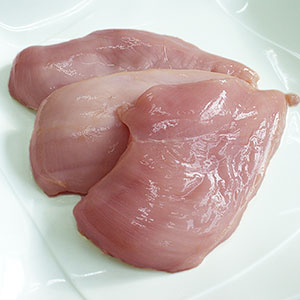
Raw chicken requires safe preparation of poultry

Two of the healthiest foods to eat are poultry and eggs. They are rich in protein and low in fat. Sadly, many people just never learned safe preparation of poultry and eggs. If not prepared with care and cooked properly, they can make you very, very ill. That is due to the possibility of bacteria that can be in raw eggs and poultry that can be transferred to your hands, utensils and counters when preparing these foods,  and you can get by eating them if not completely cooked.

Salmonella poisoning is very possible with poultry or eggs and can be life threatening. Imagine diarrhea so bad you can NOT get liquids in fast enough to make up for the ones you are losing.

Basic tips for safe preparation of poultry:

  • Wash your hands, utensils, dishes, counters and sink surfaces they come in contact with before and after use with hot soapy water. Even if just a little. Even if just liquid.
  • Do not touch a hand towel until after you have washed your hands with hot soapy water. (I have seen good cooks wipe hands on a dish towel after handling a chicken. Don’t do this! Err on the side of caution and wash your hands first!
  • Use the back of your hands (where you have not gotten any egg or poultry juice) to turn on faucets or open the trash can. In case of doubt wash anything you touched with hot soapy water too. With practice, you can get good at not touching things until your hands are clean.
  • Set up your sink faucet and hand soap so you can reach and use them easily.
  • If you know you will have trash (egg shells, poultry wrappers or parts you don’t want), open the trash before working with them.
  • Have your pans ready and in place (egg pan out and near or on the stove. Roasting pan oiled and on the counter).
  • I usually have someone assist me when I am prepping a turkey because it’s a challenge with the size and weight of it to move it around and not touch anything.
  • Most poultry recipes call for rinsing and/or wiping the bird with paper towels. Have them ready (torn from the roll) before you start prep.
  • Another trick is to have a plastic shopping bag hooked over a drawer knob for all the trash.

Basic trips for safely cooking poultry:

  • Do NOT cook a partially frozen bird! Period. My son and I got salmonella poisoning when a hostess cooked a partially defrosted turkey.  Better to give them something else than poison people.
  • Properly defrost poultry – be sure there are no crystals of ice anywhere, including inside the bird. Err on the safe side.
    • In the refrigerator is the best. Depending on the size of the bird, this can be overnight to several days. Most turkey tell how long to defrost.
    • If you need it faster or it’s not completely defrosted when you need to cook it, put it in a resealable plastic bag in a cold water bath with a slow tap on so the water stays cold.
    • The third way is to defrost in the microwave- be sure to set on defrost (30% power) and for less time than you think. Check, turn, repeat.
    • Cook to an internal temperature of 165° F and use a thermometer to check
  • Follow directions on the wrapper of the bird, or bake at using this roasting chart from foodsafety.gov.

Knowing the easy steps for the safe preparation of poultry can keep these healthy foods healthy for you.

Next time we will discuss cooking eggs.

Filed Under: Recipes, Self Care

« Previous Page
Next Page »
DISCLAIMER
©2025 LifeSkill Secrets. All Rights Reserved.
Website Designed by Richterworks Web